The Book Workspace
Navigate your writing workspace with ease. Explore the Outline, the smart Glossary, brainstorming Chats, and book settings to streamline your writing process.
Last updated: October 2025
Your book workspace is where the magic happens: A dedicated environment for writing, organizing, and refining your story. This guide will help you navigate all the tools and features available to you.
Workspace Overview
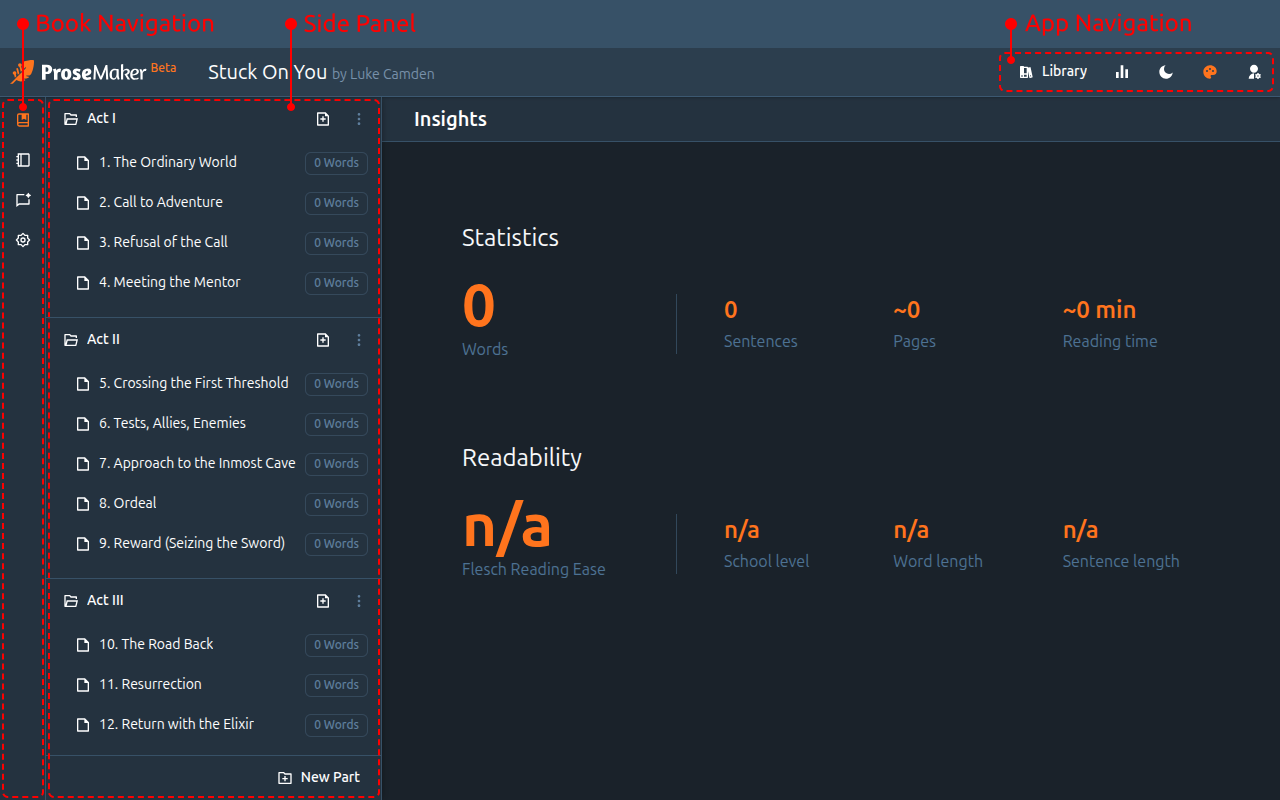
Apart from the main content the workspace is organized into three areas designed to keep everything you need within easy reach:
- App Navigation: Application-wide navigation and settings
- Book Navigation: Quick access to book-specific tools
- Side Panel: The content of the tool you selected
Let’s explore each section in detail.
App Navigation Topbar
The top bar mostly provides access to application-level features that apply across all your books.
Library Access
Use the Library button to return to your collection of books at any time. Your work saves automatically, so you can switch between books freely without losing progress.
Insights
Opens the insights view for the book you’re currently working on.
Theme Settings
Customize your writing environment to match your preferences:
- Light/Dark Mode: Switch between light and dark modes depending on your environment and preference. Many writers prefer dark mode for late-night writing sessions.
- Color Theme: Choose from different color schemes to personalize your workspace
User Menu
Access system-wide settings that affect all your books:
- Connections: Set up and manage connections to AI providers
- Prompts: Create your own prompts or duplicate and finetune the built-in ones
- Models: Configure your preferred AI models and their parameters
Book Navigation Sidebar
The left sidebar is your command center for the current book. Each option opens a panel where you can manage different aspects of your story.
Outline
Your book’s structural foundation. The Outline shows your parts and chapters in a hierarchical view, making it easy to:
- Organize your story into logical parts
- Rearrange chapters by dragging and dropping
- Add new chapters or parts as your story grows
- Click on any chapter title to open the editor in the main content area and start writing
The Outline is your roadmap to see the big picture of your story at a glance.
Glossary
Build your book’s knowledge base by creating entries for any important information relevant to your work. Whether you’re writing fiction or non-fiction, the Glossary is where you store key details like characters and locations for novels, or research findings, articles, studies, and facts for non-fiction projects. This serves as both your personal reference library and a way to maintain consistency throughout your manuscript.
Why the Glossary matters for AI: When you work with the AI companion, it references your Glossary entries to understand your book’s unique elements and context. The more detailed your Glossary, the more helpful and accurate the AI assistance becomes.
Chats
Create brainstorming sessions with your AI writing assistant. The Chats section lets you:
- Start new conversations focused on specific aspects of your story
- Brainstorm plot ideas, character development, or dialogue
- Ask questions about story structure or writing techniques
- Save multiple chat threads for different topics
Click on any chat to open the conversation in the main content area, where you can continue your discussion with the AI assistant.
Settings
Configure book-specific options that define how your story is written:
- Language: Set the language for your book
- Tense: Choose between past tense or present tense
- Point of View: Select first person, third person limited, third person omniscient, etc.
- POV Character: Designate which character from your Glossary serves as the point-of-view character (particularly useful for first-person or limited third-person narratives). Keep in mind that this is a default that you can change for every chapter if you wish
These settings help maintain consistency throughout your writing and inform the AI assistant about your stylistic choices.
Typical Workflow
- Start with Structure: Use the Outline to organize your chapters
- Build Your Knowledge Base: Add important details to the Glossary
- Configure Your Style: Set your preferences in Settings
- Write: Click a chapter in the Outline to open the editor
- Get Help: Use Chats when you need creative assistance or want to brainstorm
- Iterate: Move between these tools as needed. Afterall every writer has their own workflow
Tips for Success
- Keep your Glossary updated: As you introduce new characters, locations, or concepts, add them to the Glossary immediately. This helps the AI assistant provide better suggestions and maintains your own reference library.
- Use Chats for experimentation: Not sure how a scene should unfold? Start a chat with the AI to explore different possibilities before committing words to your chapter.
- Customize your environment: Adjust the theme and color settings to create a comfortable writing space. Your environment affects your creativity—make it yours.
- Settings apply to the whole book: The language, tense, and POV settings you choose affect your entire manuscript, so set these early and adjust only when necessary.
Now that you understand your workspace, it’s time to dive in and bring your story to life!